Wednesday, 16 January 2019

Light Fakery

One method I have explored for reducing the number of lights in a scene is the use of emissive materials.
Lift car interior
The lift car is contained within semi-opaque walls. Lighting from behind using, for example, four area lights and transmissive materials could lead to hugely increased render times.

This solution uses one point light and the walls have a subtle glow. While it may not be physically accurate, it does give a pleasing result.

Illusions - Angel Columns & The Missing Figures

I'd considered including optical illusion imagery within the scene to signify or emphasise the psychological leanings of the story. My first thought was to use simple framed images (and that is still a plan) but I came across this 3D illusion in my searches.

Angel Columns at the Phaeno Science Center
Angel Columns, David Barker (1989)
www.anopticalillusion.com/2013/09/angel-columns-at-the-phaeno-science-center/
Using negative space, Barker's piece presents a series of symmetrical, standing figures.

This led me to search for images that would suit my purpose, push the idea of authority and control. I took images of chained prisoners and developed them in a similar way, turning columns and placing them to fool the eye with negative space. These would form balusters as part of a screen in the Doctor's office.
Development of image to column
Having a set of four columns which would create two symmetrical characters, it was a small leap to juxtapose them in different combinations to produce four asymmetrical figures.

Angel columns recreation - Arnold render

Filling it out - Furniture and props

Many items of furniture and props populate the asylum corridor and Doctor's office. These help ground the scene in a time, style, mood and scale.

Modelling techniques varied according to the task at hand. 

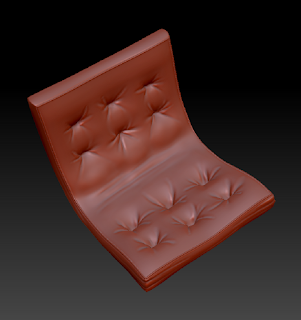
Studded cushion in ZBrush
This studded cushion was created through simple extrusion techniques before being subdivided and brought into ZBrush for sculpted detailing. This detail was projected onto the base mesh as a normal map and an orange tweed diffuse map would complete the look.
Doctor's office - Back-lit sign
This sign was created using simple box modelling and extrusion techniques. An emission map was employed to approximate the effect of a semi-opaque, back-lit sign. The diffuse map is combined with a subtle bump to represent dirt and the thickness of the painted text.
Image result for round screen tv
1950 Zenith round-screen television
www.ebay.com/itm/1950-Zenith-Tyler-12-round-screen-TV-/182543473460
Cell numbers - Antique screens
 These signs mark each cell door along the corridor. They are inspired by antique, 1950's television screens. The screen image has scan lines and a fuzzy glow created by a combination of diffuse and emission maps.
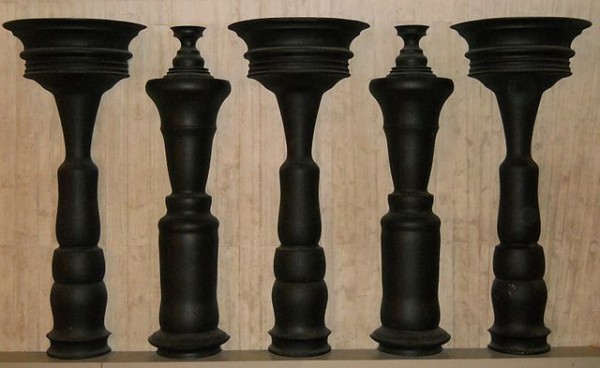
Doctor's office furniture and props

These items mark the beginning of office prop production. All office furniture is based on period or reproduction mid-century modern items.

Scale (both absolute and comparative) will be an important factor in maintaining credibility. Macro and micro detail in combination with believable shaders will assist in this with a variety of construction materials (plastic, wood, glass, metal, painted, bare, worn, eroded) displaying distinct characteristics.

Render-times

While test rendering these scenes, it seemed an opportune moment to experiment with Arnold's render settings. Initial renders were running at 46 minutes/frame at 720p which was clearly unacceptable.

46 minutes - All lights, high settings
Through a combination of reducing the use of lighting and incremental changes to sampling and ray depth values, acceptable images could be produced in a little over 6 minutes.
13 minutes - Lights removed from cells
12 minutes - Sampling settings reduced, cell lights converted to simple points
11 minutes - Adaptive sampling employed
7 minutes - Specular ray depth reduced to zero
6 minutes - Fine adjustment of settings
While this process was worth exploring, the scene is still in development and render times are likely to increase. With this in mind, it may become necessary to bake light maps from static light sources to simplify the scene.

Fleshing out the environment - Textures

The task of detailing and texturing the environment seems quite onerous...

Deep breath... one step at a time

Initially this was an exercise in UV layout, sourcing and preparing textures and creating Arnold shaders (with believable material properties).

Other considerations would soon surface:

  • The use of tileable/ seamless textures for large areas
  • The application of wear and dirt to support the environment's story
  • Organisation of multiple textures images in the UV space 
  • The use of advanced material properties and production of supporting maps - Bump, normal, transmission, emission and specular.

In this working example render, a few problems can be seen.
  • The brick texture does not align across UV boundaries (i.e. at the quoins)
  • Although dirt has been applied to the floor texture, it appears uniform without signs of wear through footfall and age.
  • The lampshades do not display the transmissive attributes applied. This would prove to be a problem converting materials between Arnold versions.

In this later iteration, the material transmission problem has been fixed by replacing the legacy shader.